
As a kind of Christmas gift to myself, I spent the 5th day of Christmas disassembling and installing a new battery into this “shelved” phone of mine. It is something I have wanted to do since the battery started fading and I finally got to it.
I bought a battery replacement kit on eBay for this phone that had most of the tools I needed. I am not going to provide you a tear down video, there are plenty of those on YouTube and if you are interested in that, click here. This will tell you everything you need to know and possibly more. I am going to focus more on the ares of difficulty and the installation of LineageOS.
Pixel was an okay phone but was a bit too small for my hand, I didn’t like how it fit in my phone holder in my truck, the battery didn’t end up being much better on that phone after about 6 months of use and I couldn’t put LineageOS on it because it is locked down.
Repair Supplies
The video gives you a list of tools to use to do the repair. I didn’t have everything, exactly as they suggested. I grabbed my whole kit of tools available and this is what I ended up using:
Plastic triangle opening tool of two different thicknesses

Tweezers. I used whatever tweezers I had in my tool box which ultimately came from the bathroom medicine cabinet. I would recommend a better set but something is better than nothing

Box cutter. I didn’t have a precision knife set as per recommended in this video and I would highly recommend something like that and I won’t do another repair without it. The box cutter worked but that is a little like using a sledge hammer when all you need is a 16 oz claw hammer. Sure, it gets the job done but makes a bit of a mess of your project surface.

Paper clip in place of a sim card ejection tool.

Heat gun. Mine was probably overkill but it worked fine.

Small Cross-recessed (Phillips) screw driver. The battery kit came with screw drivers but I prefer my nicer, more professional set. Even I can show up to a party in the right outfit from time to time…

The video recommends playing cards but those were chewed up pretty quick on me so I had to use some more ridged cardboard to slide between the battery and the body of the phone. Your mileage may vary. In my case, this “Hello Fresh” junk mail bit worked better than a playing card. Basically, anything ridged that is not so stiff as to crease the battery and cause it to vent with flame.

I used a spudger but not a fancy black nylon one, this one was able to pry and get between the frame and the screen well enough.

Double sided sticky tape to put the lower back panel back on

I also used a dental pick to help with the picking at the device. I recommend something like this for so many of your smaller projects, especially if you have giant sausage fingers.

1 hour of time to devote to the project
The two areas of extra care for this project is removing the glass around the camera and the battery.
The glass needed to be loosened up with the heat gun, gently, as to not over heat the device. Doing so can cause irreparable damage to the device. Once I got this portion heated up enough, the glue started to let go of the glass plate enough to allow me to get that knife in there. This would have been easier with smaller, more precise tools. Thankfully I didn’t break it.

Once the glass and the plastic cover are removed, that will expose the 6 screws holding the device together.

The spudging tool will be required to carefully pull the body of the phone from the screen assembly. I was “fortunate” that this phone has a bit of an area of buckling around the volume button and made it a bit easier to get the case away from the screen assembly.

The phone comes apart and exposes all the little secrets of its design. It also exposed the fact that this thing is incredibly dirty and needed a good cleaning with some isopropyl alcohol.


The other area of concern is the battery. It is imperative you take extra care as to not bend the lithium-polymer battery too much or this will “vent with flame” and it can be a rather spectacular event, one that I was not interested in having. There is a small amount of clearance that will allow you to start prying away at this battery. I carefully used the heat gun to loosen the glue here as well. Once I got the battery up a little, I used several card like things to pry this up.

The rest of the instruction per the video was spot on but the emphasis on the glass and the battery was a bit understated, from my view.
Reassembly of the device was pretty straight forward. It assembles pretty easily. Install the battery, I reused the adhesive pads from the previous battery. Then carefully install the cables, make sure they are fitted well. The glass still had enough adhesive on it that it will keep the glass in place. The bottom plastic bit needed some double-sided tape to keep it in place.

Since this phone wasn’t exactly a “looker” when I started, I am not concerned about how it looks when complete. It is also in a case that will help to hold things in place.

Upgrading the Operating System
This was actually a lot more time consuming than fixing the battery, I am sorry to say. When I started the phone I was greeted with this error about a vendor mismatch.
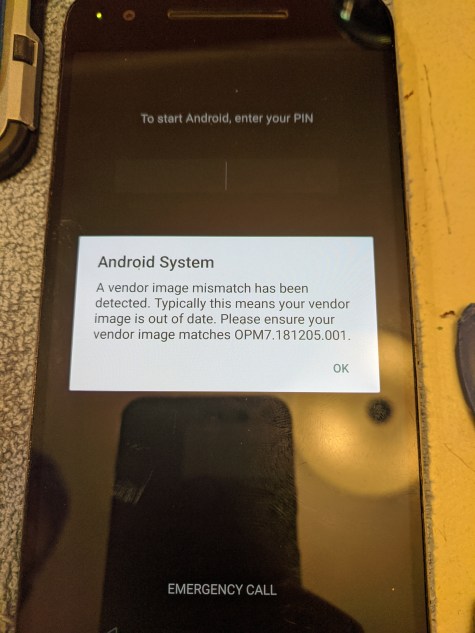
I have seen this error before so it wasn’t a big deal in fixing this. I downloaded the Google image and flashed the vendor image as per the instructions I found here. In short, here is the process I went through:
- Downloaded the nightly ROM and the Gapps (mini Gapps) and put them on your phone
- Download the Google Angler image
- Wiped device (do not wipe the internal storage)
- Flashed the three image files (using fastboot commands)
fastboot flash bootloader bootloader-angler-angler-*.imgfastboot reboot bootloaderfastboot flash radio radio-angler-angler-03.78.imgfastboot reboot bootloader- Flash the Lineage ROM and the mini Gapps
- Wipe cache, reboot
I admit these instructions are not as verbose as I normally give. If you have any issues, please leave a comment or email me and I will take the time to make it more verbose.
After this process, the phone would not recognize SIM for cell service. I tried flashing the radio and vendor image and still, nothing. I used this little trick from here which also didn’t help, it only told me that it didn’t know the IEMI.
That trick is, on the dial pad, Type in *#*#4636#*#*
It exposes some very interesting bits of information about your phone.
I reinstalled using these instructions several times. Service mode didn’t provide me any solutions and I feared that I somehow erased the very definition of the phones cell radio identification.
As a kind of last ditch effort, I installed the stock Android image and the cell phone signal miraculously worked again. Installing Lineage OS once again left me with no access to the radio. After some more web crawling, the solution sort of come from this Reddit post that said the issue has something to do with the system lock not releasing the cellular radio to the system.
Sure enough, after disabling all the security features, and rebooting the cell service works once again. The specific issue is with this “Secure start-up” where it requires a bit before starting the system. There is some kind of bug in this that is causing issues. Where exactly, I have no idea.

In order to implement this solution, to disable the “Secure start-up” feature and prevent the SIM from being locked out. Go to, Settings > Security & Privacy > Screen lock. I prefer a pin lock screen and when you do enter your desired pin, you are asked for your “Secure start-up” preference. Say “No”, rebooting the device and the cell service will work normally.
I have installed all the important applications and I am back to full mobile capacity… which… is a pretty short list, really.
Final Thoughts
Phones today are, frankly, terribly designed. The process to replace the battery is unnecessarily tedious. At this point, I would consider any phone without a user accessible battery a terrible design and I will not purchase another phone that locks away a battery. That signals a design with planned obsolescence. All that does is encourage greater levels of e-waste. I have great hope in the up and coming PinePhone that may not have the performance capabilities of a modern “flag-ship” phone but no matter how much it may lack in processing power, storage, or RAM, it does have a replaceable battery. That means it won’t be a turd of a design that you get from the likes of Apple, Samsung or Huawei.
LineageOS is now a must to have a good Android experience. I tried to go several months on Google-locked Android and frankly, that is not a good experience. The lock down of applications on the phone is terrible. I should be able to remove whatever applications I want. I have reaffirmed that I will not purchase another locked mobile device, newer does not mean better and stock Android is vastly inferior to Lineage OS Android. It’s not even a fair comparison on the significant user improvements the Lineage team puts into Android.
Ultimately, I look forward to the PinePhone. To have an unlocked, user serviceable device that may be a bit less capable on raw performance is a welcome upgrade to just about any mobile phone out there. Give me a headphone jack and access to my battery! I am now done with these mobile nightmare devices.
References
Nexus 6P Repair Video
Lineage OS installation Guide
Reddit Post on SIM not detected
PinePhone from Pine64
Factory Install Google Android on Nexus 6P
Vendor Mismatch Fix for LineageOS on Reddit
Leave a Reply